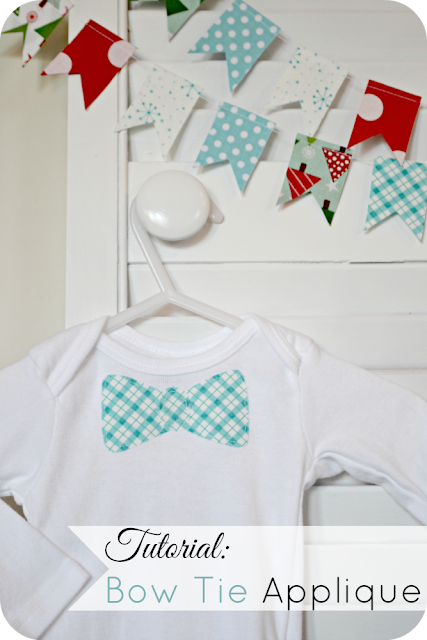
How about a fun twist on a classic wardrobe staple with this appliqued outfit? What a dashing little guy your precious boy will be at his next play date in this bow tie onesie.
These make excellent gifts too! Do you know a mom about to have a baby boy? You'd be the talk of the baby shower with this handmade item!
Bow tie applique tops are so quick and easy to make and look super cute! Need one for an older boy? Just follow the same process with a t-shirt in his size. Ready to make your own for that sweet little guy in your life? Here's how...
Bow Tie Applique Top
Materials
Materials
t-shirt or baby bodysuit
fabric (My fabric came from Raspberry Creek Fabric. It is the aqua snow fence print of the Ready, Set, Snow Collection from Me and My Sister for Moda.)
pencil & paper
Heat N Bond Lite
sewing machine
iron
seam ripper (optional)
Directions
1. Begin by reading and following the directions on the Heat N Bond Package. Iron a piece of the Heat N Bond onto the wrong side of the fabric you are using for your bow tie. Make sure that your piece of fabric is slightly bigger than the piece of Heat N Bond to prevent sticky residue from getting on your work surface or on your iron.
2. Sketch and cut out a bow tie shape and a small oval with pencil and paper to create a pattern. Pin your pattern pieces onto your fabric.
3. Cut out the main and center bow tie pieces. Tip: Save any of the extra fabric that has the Heat N Bond fused to it for future appliques.
4. Peel off the paper backing from your bow tie. Position it onto the t-shirt, bodysuit, or other item you are appliqueing. Iron it in place paying close attention to the edges.
5. Stitch around the applique. I like to use a ball point needle anytime I am sewing something onto the soft knit fabric of a t-shirt or baby bodysuit. Sew around each section (left portion of the bow tie, center, right portion of the bow tie) separately. I like to use a straight stitch just inside the perimeter of the fabric. Do no back stitch at the start and finish like you normally would when sewing.
6. Pull all of the strands to the inside of the outfit. Tip: Tug on the inside strands a bit and slip a seam ripper into the loop that shows up to gently pull all strands to the inside. Knot the strands together a few times and snip them close to the garment. Since you sewed three different sections, you'll actually need to tie a knot to finish off the threads at each section.
7. That's it! You are done! Big tip: Do not leave the outfit in the sewing machine when your baby is crawling around on the floor near the sewing machine pedal. Yep, you know where this is going. {laughing} Sweet Caleb crawled right over the pedal while my project was still in the machine. Let's just say that I needed the seam ripper for more than just step 6. I'm laughing about it now, but at the time...it wasn't very funny. I guess he just wanted to help mommy sew. That's what I get for trying to sew outside the parameters of nap time and bed time.
Other posts you might enjoy...
Happy sewing!


I haven't used heat and bond, but I have used a glittery similar project. I love how you stitched around the edges. I am going to take a peek around. Visiting from @DearCreatives Happy holidays & drop by sometime if you get a chance. I found you via a link up. Theresa
ReplyDeleteIt's is so cute!
ReplyDeleteI so wish I could make it for my nephews :)
Have a wonderful holiday Jennifer
Cute--and I love that fabric!
ReplyDeleteThis is adorable! I think I'm going to make like 50 decorated onsies when I get pregnant they look so fun to make and are so adorable!
ReplyDelete